- Nuevo
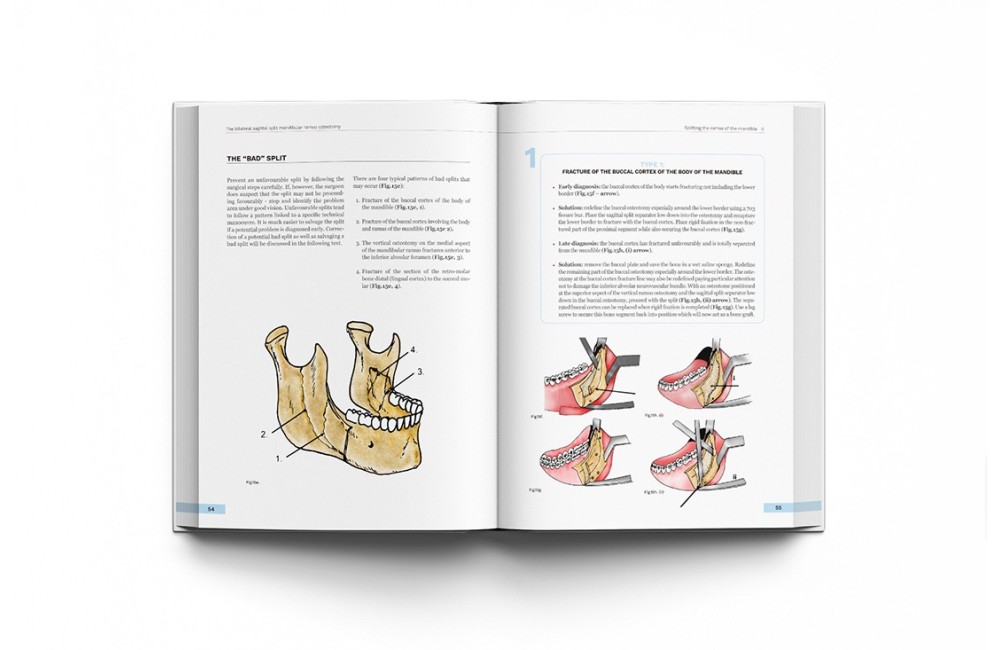
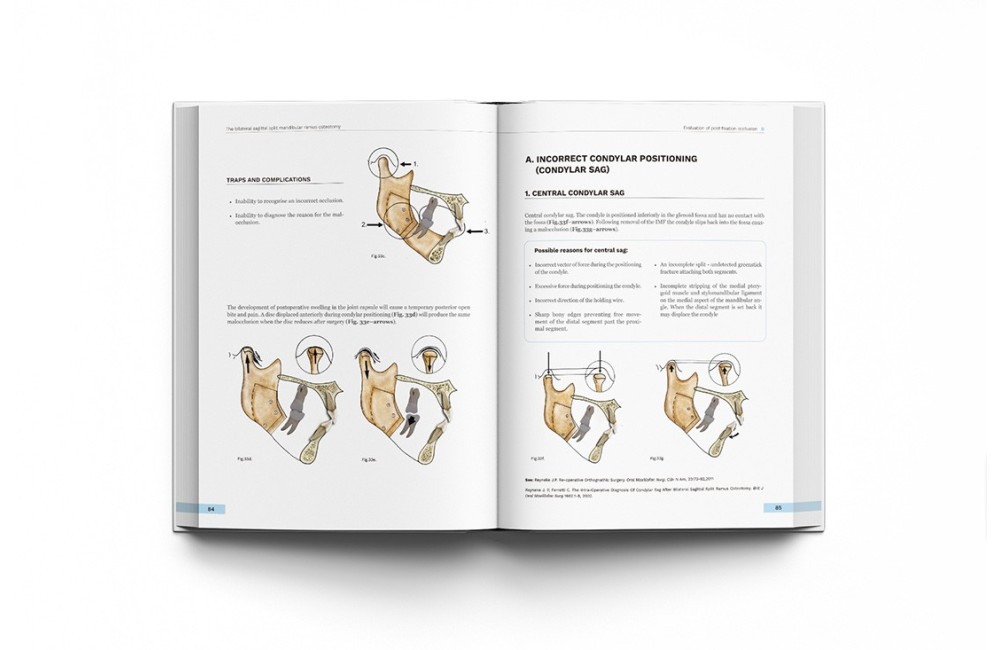
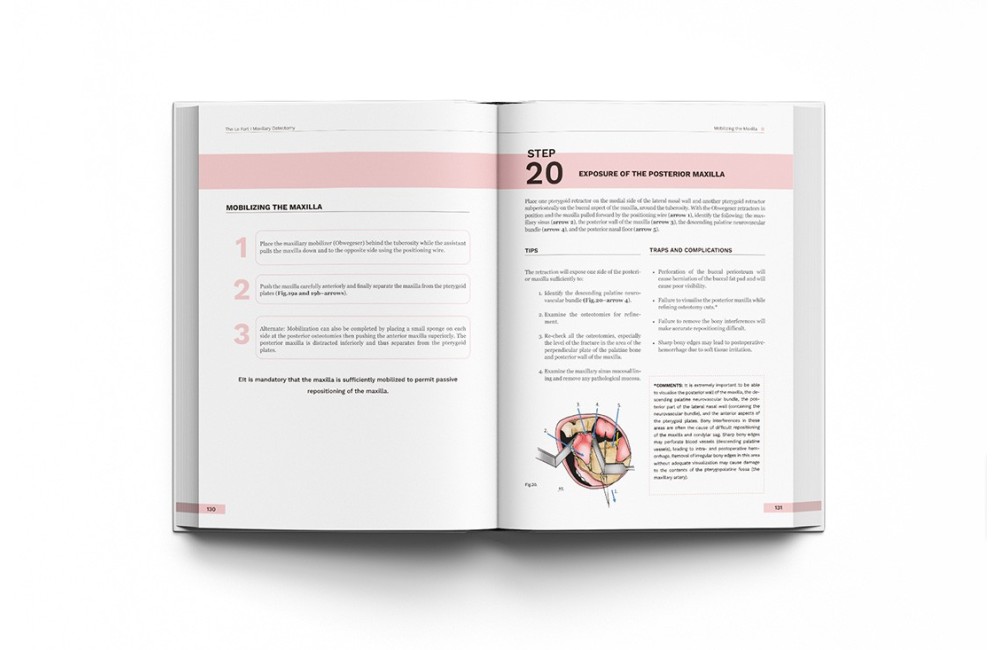
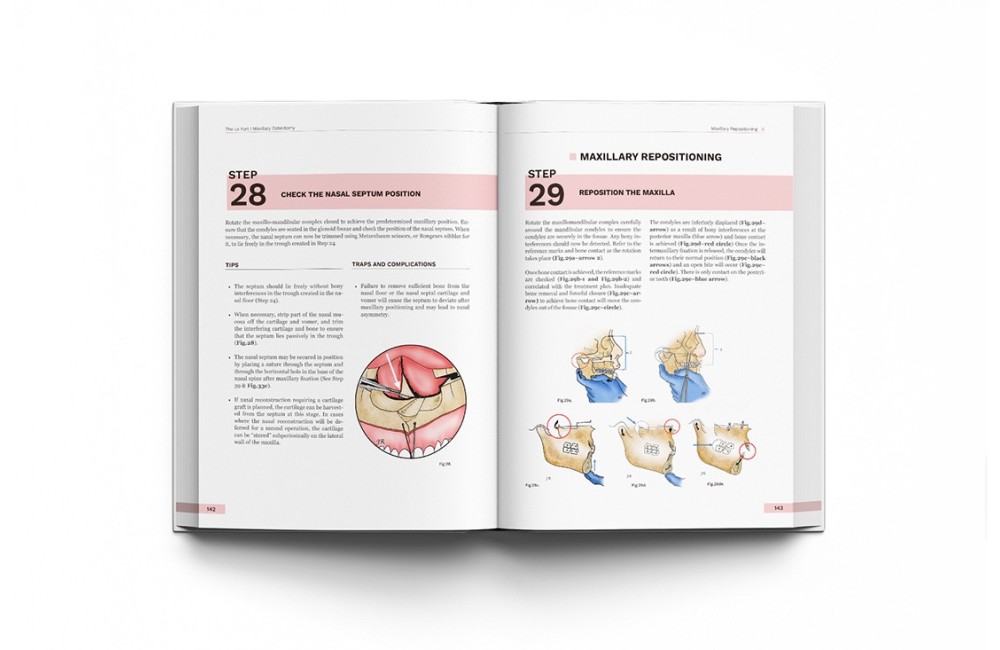
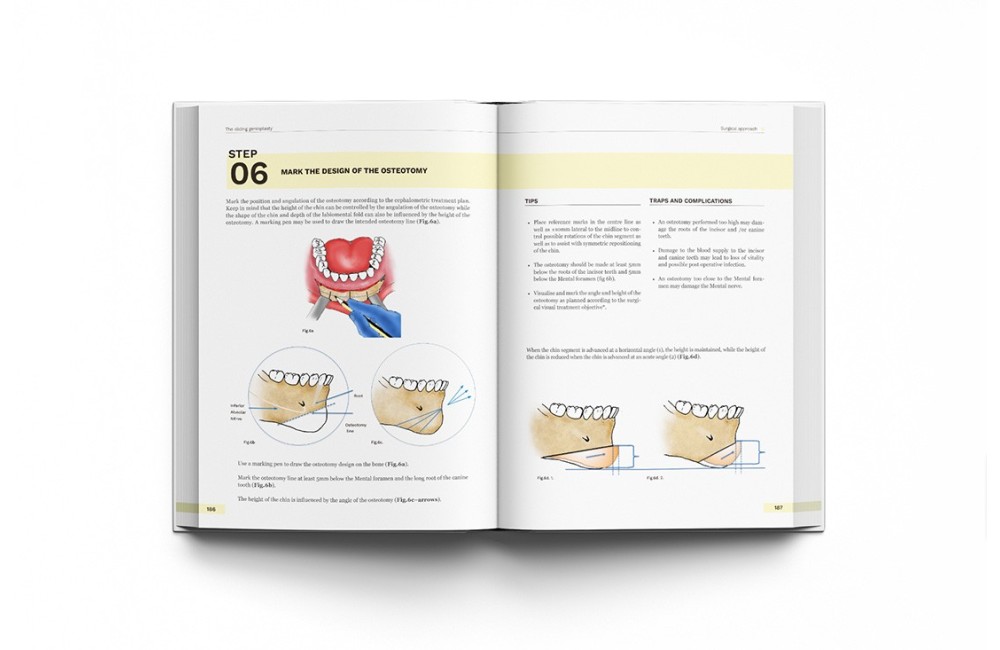
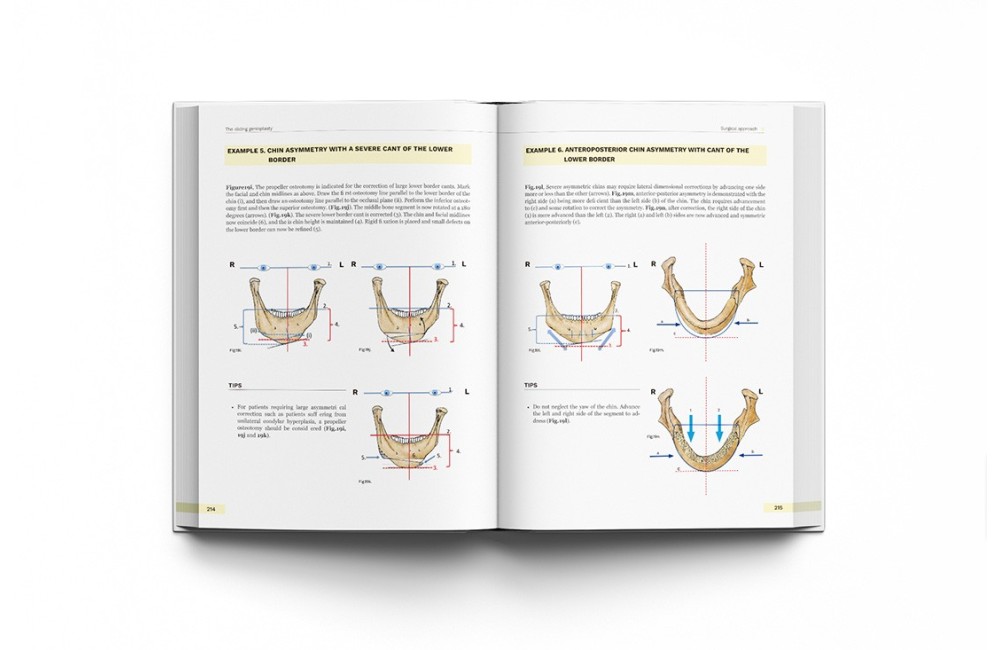
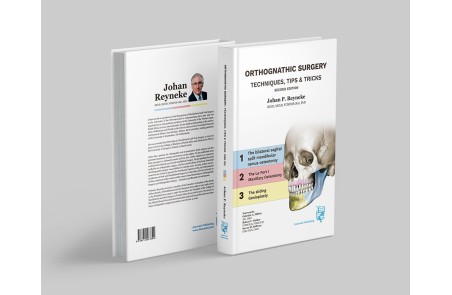
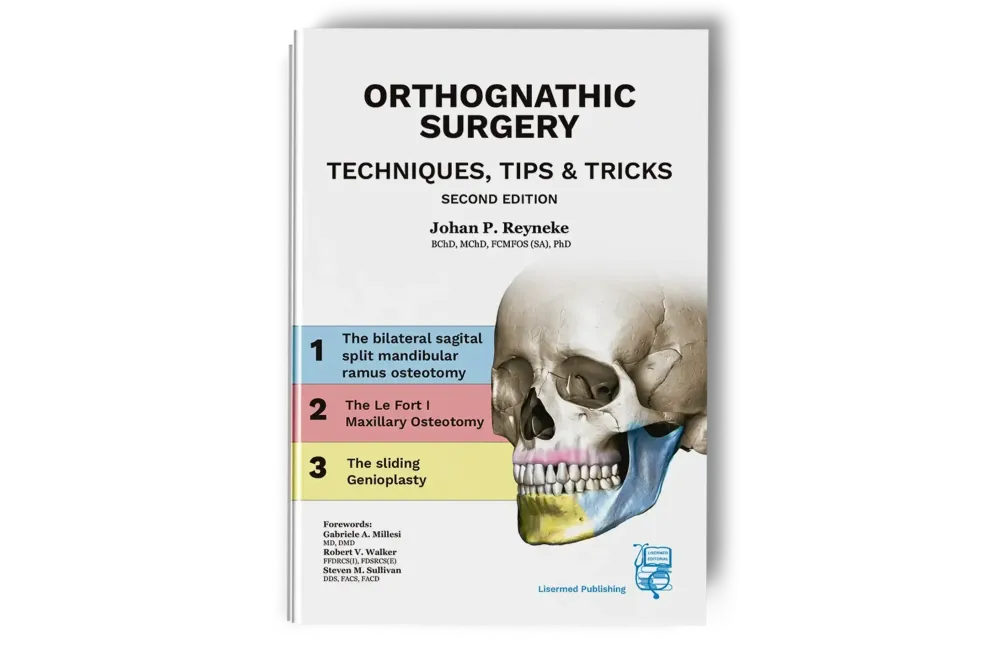
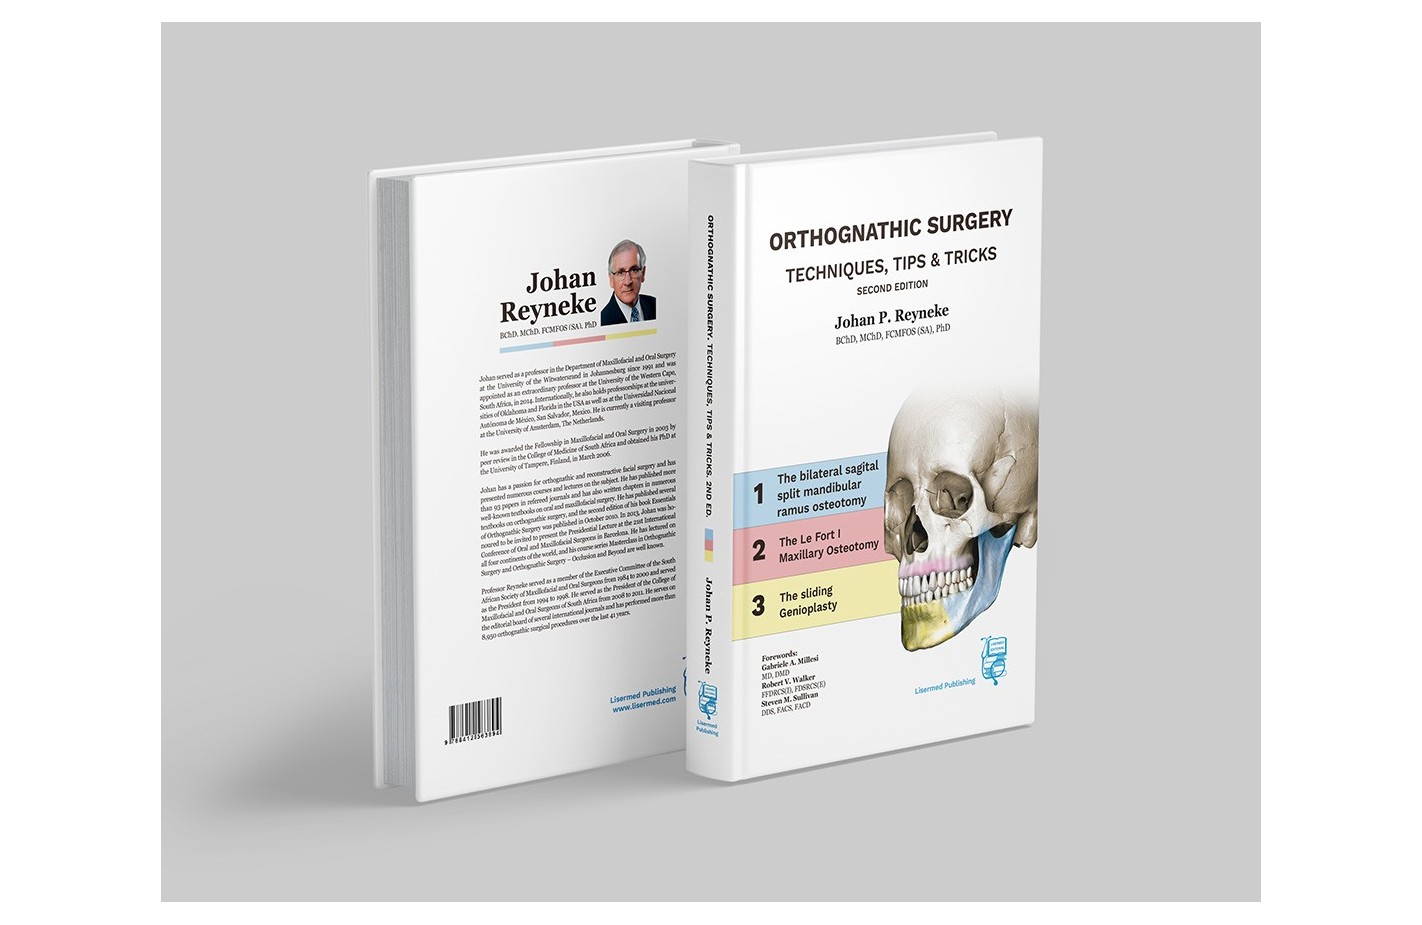
Master the art of mandibular sagittal ramus osteotomy with this essential manual by world-renowned expert Prof. Johan Reyneke. Drawing from thousands of successful cases, this guide transforms complex 3D data into a safe, clinical, step-by-step surgical maneuver.
Perfectly illustrated and thoroughly detailed, the manual goes beyond basic technique to provide "tricks of the trade" for avoiding and managing complications. Whether you are a trainee building a foundation or an experienced surgeon seeking to improve predictability and safety in dysgnathia corrections, this book offers a rare opportunity to learn directly from a global "guru" of orthognathic surgery.
- Disciplina/s:
- Cirugía oral y maxilofacial
- Idioma:
- Inglés
- Encuadernación:
- Tapa Dura
- Edición:
- 1ª Edición
- Año de publicación:
- 2025
- Número de páginas:
- 225
979-13-990060-8-7
979-13-990060-8-7
Índice de contenidos
Table of Contents
- PART 1: THE BILATERAL SAGITTAL SPLIT MANDIBULAR RAMUS OSTEOTOMY
- SURGICAL APPROACH
- Step 1. Infiltrate the area of the intendid soft tissue dissection with a vasoconstrictor
- Step 2. Soft tissue incision
- Step 3. Buccal subperiosteal dissection
- Step 4. Superior subperiosteal dissection
- Step 5. Medial subperiosteal dissection
- Step 6. Identifi cation of the lingula 34
- PERFORMING THE OSTEOTOMY
- Step 7. Medial ramus osteotomy
- Step 8. Vertical vertical ramus osteotomy
- Step 9. Prepare for the vertical buccal osteotomy
- Step 10. Buccal osteotomy of the mandibular body
- Step 11. Drill the holes for the placement of a holding wire
- Step 12. Drill a purchase hole for the condylar positioner* and place reference marks perpendicular to the vertical osteotomy line
- SPLITTING THE RAMUS OF THE MANDIBLE
- Step 13. Define the osteotomy cut with an osteotome
- Splitting the mandible
- Step 14. Starting the split
- Step 15. Completion of the split
- The bad split
- 1. Fracture of the buccal cortex of the body of the mandible
- 2. Fracture of the buccal cortex involving the body and ramus of the mandible, and continues to the coronoid process
- 3. The vertical osteotomy on the medial aspect of the mandibular ramus fractures anterior to the inferior alveolar foramen
- 4. Fracturing the segment of bone distal to the second molar
- Step 16. Stripping the pterygo-masseteric sling
- Step 17. Stripping the medial pterygoid muscle and stylomandibular ligament for setback procedures
- Step 18. Removal of impacted third molars
- PREPARATION FOR REPOSITIONING THE DISTAL SEGMENT
- Step 19. Contour contact areas of the bone segments
- Step 20. Placement of a holding wire (018”)
- Step 21. Note the position of the inferior alveolar neurovascular bundle
- Step 22. Note the position of the third molar tooth (socket)
- Step 23. Lavage
- Step 24. Splitting the opposite side
- Step 25. Mobilize the distal segment
- Step 26. Selective odontoplasty and placement of a intermaxillary fixation
- Step 27. Removal of bone for mandibular setback procedures
- PROXIMAL SEGMENT REPOSITIONING
- Step 28. Condylar positioning
- PLACEMENT OF RIGID FIXATION
- Step 29. Tightening the holding wire
- Step 30. Placement of the trocar
- Step 31. Placement of rigid fixation. Bicortical screws
- Step 31. Plate fixation
- Step 32. Remove the intermaxillary fi xation and check the occlusion
- EVALUATION OF POST FIXATION OCCLUSION
- Step 33. Intra operative diagnosis of an incorrect occlusion
- A. Incorrect condylar positioning (condilar sag)
- 1. Central condilar sag
- 1.1. Bilateral central condylar sag
- 1.2. Unilateral central condylar sag left side
- 1.3. Unilateral condylar sag right side
- 2. Peripheral condylar sag type I
- 3. Peripheral condylar sag type II
- 3.1. Bilateral peripheral condylar sag
- 3.2. Unilateral peripheral condylar sag right
- 3.3. Unilateral peripheral condylar sag left
- 1. Central condilar sag
- B. Mobility at the osteotomy site
- C. Movement of the occlusion during placement of rigid fixation
- D. Maloclusion as a result of a poorly fitted final surgical splint
- COMPLETE THE PROCEDURE
- Step 5. Place intra- and extra-oral sutures
- Step 6. Place elastics – 4Oz, 1/4”
- Step 7. Place a pressure dressing 95
- SURGICAL APPROACH
- PART 2: THE LEFORT I MAXILLARY OSTEOTOMY
- SURGICAL APPROACH
- Step 1. Infi ltrate the soft tissue with a vasoconstrictor
- Step 2. Mucosal incision
- Step 3. Complete the soft tissue incision through the muscle and periosteum onto bone
- Step 4. Subperiosteal dissection
- Step 5. Intraoral reference marks & extraoral measurements
- PERFORMING THE OSTEOTOMY
- Step 6. Anterior buccal osteotomy
- Step 7. Posterior buccal osteotomy
- Step 8. Connect the anterior and posterior osteotomies
- Step 9. Prepare for buttress wires
- Step 10. Separate the tuberosity from the pterygoid plates
- Step 11. Complete and refi ne the posterior maxillary osteotomy
- Step 12. Lateral nasal wall osteotomy
- Step 13. Complete the soft tissue incision on the contralateral side and perform the osteotomies on the opposite side
- Step 14. Place a maxillary positioning wire
- Step 15. Complete the subperiosteal nasal spine dissection
- Step 16. Septal cartilage and vomer osteotomy
- MAXILLARY DOWN FRACTURE
- Step 17. Maxillary down fracture
- FAILURE TO EFFECT MAXILLARY DOWN FRACTURE
- Step 18. Redefine the osteotomies
- Step 19. Mobilize the maxilla
- Step 20. Exposure of the posterior maxilla
- Step 21. Check the level of the fracture
- Step 22. Trim the lateral nasal wall
- Step 23. Refine the osteotomy at the posterior maxilla
- REFINE THE OSTEOTOMY
- Step 24. Reduce the palatal aspect (nasal floor) of the septum
- Step 25. Contour the piriform rim
- Step 26. Feed positioning wires through the drilled holes
- INTERMAXILLARY FIXATION
- Step 27. Place the splint and apply intermaxillary fixation
- Step 28. Check the nasal septum position
- MAXILLARY REPOSITIONING
- Step 29. Reposition the maxilla
- Step 30. Turbinectomy (if necessary)
- Step 31. Nasal mucosa suturing
- Step 32. Tighten the buttress wires
- Step 33. Rigid fixation placement
- SEGMENTAL MAXILLARY SURGERY
- 1. Interdental osteotomies
- 2. Nasal floor (palatal) osteotomy
- 3. Closing interdental spaces
- 4. Fixation and stabilization after segmental osteotomies
- EVALUATE THE OCCLUSION
- Step 34. Remove the intermaxillary fi xation and carefully check the occlusion
- POST-PROCEDURAL SUTURING
- Step 35. Place a cinch and nasal septum suture
- Step 36. Submucosal suturing
- Step 37. Mucosal suturing
- PROCEDURE COMPLETION
- Step 38. Placing elastics or intermaxillary fixation
- Step 39. Apply a pressure dressing
- Step 40. Extubation
- SURGICAL APPROACH
- PART 3: THE SLIDING GENIOPLASTY
- SURGICAL APPROACH
- Step 1. Infiltration of the soft tissue with a vasoconstrictor
- Step 2. Mucosal incision
- Step 3. Submucosal incision
- Step 4. Mucoperiosteal dissection
- Step 5. Mark reference points
- Step 6. Mark the design of the osteotomy
- PERFORMING THE OSTEOTOMY
- Step 7. Osteotomy of the chin
- MOBILIZING THE CHIN SEGMENT
- Step 8. Mobilisation of the chin
- Step 9. Engage the positioning wire
- Step 10. Reduction of soft tissue tension
- Step 11. Refinement of the osteotomy
- ANTEROPOSTERIOR AUGMENTATION OF THE CHIN
- Step 12. Repositioning the chin segment
- INTERNAL RIGID FIXATION OF THE CHIN SEGMENT
- Step 13. Tri-cortical fixation
- Step 14. Placement of the tricortical screwss
- BONE PLATE FIXATION
- Step 15. Bone plate fixation as an alternative to screw fixation
- ANTEROPOSTERIOR REDUCTION OF THE CHIN
- Step 16. Antero-posterior reduction of chin prominence
- VERTICAL AUGMENTATION OF THE CHIN
- Step 17. Down graft of the chin segment
- VERTICAL REDUCTION OF THE CHIN
- Step 18. Vertical reduction of the chin
- CORRECTION OF CHIN ASYMMETRY
- Step 19. Correction of asymmetry of the chin
- CORRECTION OF TRANSVERS CHIN DEFORMITIES
- Step 20. Changing the width of the chin
- 1. Altering the posterior dimension of the chin: Widening (increasing the posterior width / Narrowing (decreasing the posterior width
- 2. Altering the anterior dimension of the chin: Widening (increasing the anterior dimension and squareness of the chin) / Narrowing (decreasing the anterior width and squareness of the chin)
- Step 20. Changing the width of the chin
- COMPLETION OF THE PROCEDURE
- Step 21. Suture the submucosal tissue
- Step 22. Suture the mucosa
- Step 23. Place a pressure dressing
- SURGICAL APPROACH
No reviews